Quick Answer
If you are looking for the best Zarya build in HOTS and how to get real value out of her shields and energy, this guide breaks it down in a practical, real-match way. Zarya is a protective flex support who wins by turning enemy aggression into charge, control, and much safer pressure for the rest of her team.
This guide helps you stop shielding randomly on Zarya and start using barriers as momentum tools instead of just emergency buttons.
She feels best when the enemy finally commits and discovers they just powered up the hero who was waiting for exactly that mistake.
Hero Identity and Role Breakdown
Zarya sits in a very useful support-adjacent role because she brings protection without behaving like a traditional healer. Her personal and allied barriers can erase huge chunks of burst, her damage becomes much more threatening as energy builds, and her heroics let her either force clumps or zone space hard. She is not trying to out-heal damage. She is trying to make the enemy's first commit cost them control of the whole fight.
That value disappears if the barriers are mistimed. Shielding poke for no reason, missing charge windows, or spending your control abilities without a plan turns Zarya into a much flatter hero. Good Zarya play feels like momentum theft. The enemy pushes first, and somehow your team gets more out of it than they do.
Zarya Abilities Explained
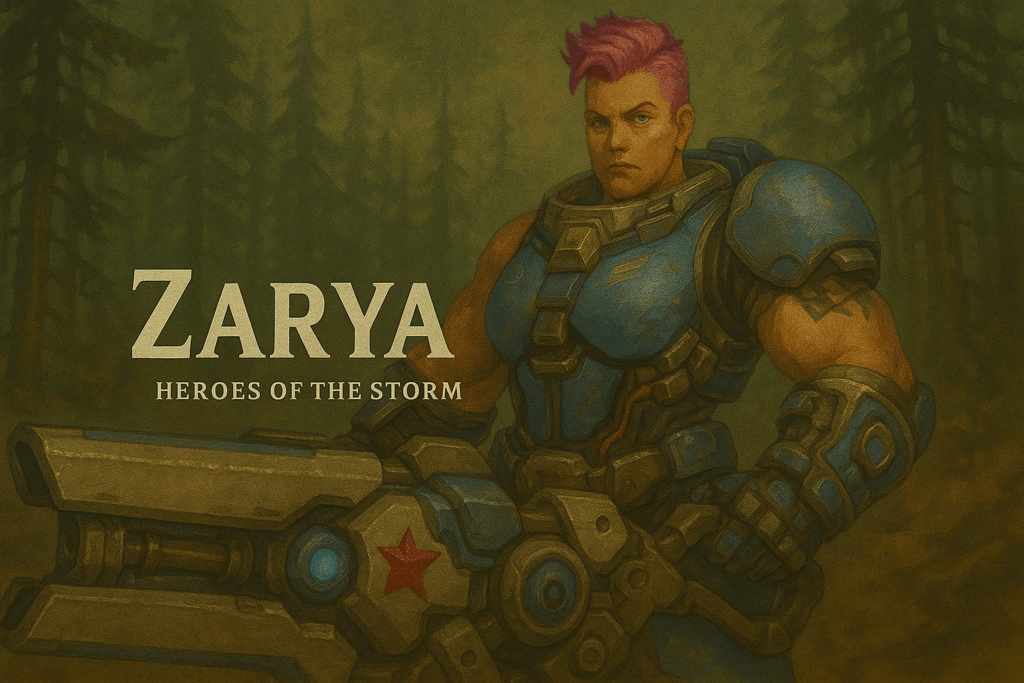
Energy (Trait - D) Dealing damage with abilities grants Energy, increasing Basic Attack and Particle Grenade damage up to 100%. Particle Grenade (Q) Lobs an explosive grenade that deals damage in an area, scaling with Energy. Personal Barrier (W) Grants Zarya a shield that absorbs damage and provides Energy when damaged. Shield Ally (E) Shields target ally, absorbing damage and granting Energy when the shield takes damage. Graviton Surge (R1) Creates a gravity well that pulls enemies toward center and deals damage over time. Expulsion Zone (R2) Creates a large area that knocks back and damages enemies who enter.
Barriers are everything. Zarya becomes threatening when the shield timing, the charge gain, and the follow-up pressure all connect inside the same exchange.
How to Play Zarya (Step-by-Step)
- Use Personal Barrier proactively when engaging minions or poking enemies to build energy safely
- Shield allies right as harassment lands or as they commit into dangerous space
- Focus on energy generation rather than pure damage output until you reach higher energy levels
- Spend reps practicing grenade placement to hit multiple minions while building energy stacks
- Shield diving allies on contact so the first enemy burst feeds energy instead of kills
How to Play Zarya Effectively
In lane and in the early map phase, The goal is to use Personal Barrier proactively when engaging minions or poking enemies to build energy safely. Shield allies who are taking harassment or diving into dangerous positions. A lot of the value comes from energy generation rather than pure damage output until you reach higher energy levels. You get much more value once you practice grenade placement to hit multiple minions while building energy stacks.
In teamfights, Shield diving allies immediately as they engage to absorb the initial burst of enemy focus. The goal is to use Personal Barrier when enemies target you, turning their aggression into your damage potential. At high energy, position aggressively to maximize basic attack and grenade damage output. A lot of the value comes from saving heroics for key moments - Graviton Surge for wombo combos, Expulsion Zone for peel.
Around objectives, The goal is to use shields to enable aggressive objective contests by protecting key teammates. Build energy from objective damage sources like shrine beams or immortal attacks. Position to threaten enemy backlines when at high energy during objective fights. The goal is to use Graviton Surge to control enemy positioning around capture points or objectives.
The beginner-friendly version is simple: shield real commitment instead of harmless poke, watch which ally is about to take meaningful heat, and think of your energy bar as the receipt for enemy impatience.
In some games, Zarya can feel underwhelming until the enemy finally commits hard enough to feed her charge - that is normal. She gets much stronger once fights stop being theoretical and someone actually has to go in.
Best Zarya Builds (Level 1 to 20)
Together We Are Strong at level 1, Hit Me at level 4, Give Me Twenty at level 7, Graviton Surge at level 10, Born in Battle at level 13, Pain is Temporary at level 16, Gravity Kills at level 20
Gameplay Focus - Maximum Charge
Energy Generation, Sustained Damage, Team Protection
This build maximizes Zarya's core identity as an energy-fueled powerhouse who grows stronger throughout fights. The synergy between enhanced shield mechanics and energy generation creates a feedback loop where protecting your team directly translates into devastating damage output. By focusing on maximizing shield value and energy gain, you become an unstoppable force that can frontline effectively while providing crucial support to diving allies. This build excels in compositions with aggressive melee carries who can benefit from your shields while helping you generate maximum energy. The longer fights last, the more dangerous you become, making this build perfect for maps with extended objective phases and drawn-out teamfights where your energy advantage compounds over time.
Together We Are Strong increases ally shield absorption, generating more energy per shield usage. Hit Me extends Personal Barrier duration, allowing for more damage absorption opportunities. Give Me Twenty provides energy when shields expire unused, ensuring consistent energy generation. Graviton Surge enables massive wombo combo potential with your high-energy damage output. Born in Battle grants spell armor when shielded, making you incredibly tanky during engagements. Pain is Temporary makes you Unstoppable when using Personal Barrier, preventing crowd control chains. Gravity Kills dramatically increases Graviton Surge damage and adds a massive slow effect.
Shield allies just before they take damage rather than preemptively to maximize energy gain. Use Personal Barrier when diving into enemy teams to become an unkillable damage threat. At high energy, prioritize basic attacks over abilities for consistent DPS output. Combine Graviton Surge with allied area damage for devastating team wipe potential.
In short, You're the Unstoppable Juggernaut . Transform enemy aggression into overwhelming damage while keeping your team alive through perfect shield timing.
This build looks very strong when the enemy has to engage honestly, but it loses a lot of value if barriers are spent on meaningless poke and your charge never really gets rolling.
Zarya is not a healer pretending to tank. She is a momentum support who turns the enemy's first commit into your team's charge bar.
This wins when the enemy finally commits hard enough to feed you the charge bar they should have respected.
Alternative Zarya Build (Level 1 to 20)
Together We Are Strong at level 1, Maximum Charge at level 4, Defensive Shielding at level 7, Expulsion Zone at level 10, Spell Barrier at level 13, Cleansing Shield at level 16, Clear Out at level 20
Gameplay Focus - Support Tank
Team Protection, Crowd Control, Utility Support
The Support Tank build transforms Zarya into the ultimate team enabler, prioritizing ally protection and battlefield control over personal damage output. This build leverages enhanced shield utility and crowd control effects to create space for your team while neutralizing enemy threats through superior positioning and peel potential. Your role shifts from damage dealer to guardian angel, using shields not just for energy but as powerful utility tools that can cleanse debuffs, provide spell armor, and enable aggressive plays from teammates. This build shines in compositions with high-value backline carries who need protection, or against enemy teams with heavy crowd control and burst potential that requires constant vigilance and reactive shielding.
Together We Are Strong maximizes the protective value of ally shields for better team support. Maximum Charge provides energy from basic attacks, maintaining damage relevance without ability focus. Defensive Shielding grants spell armor to shielded allies, providing incredible anti-burst protection. Expulsion Zone offers massive area denial and peel potential for team protection. Spell Barrier gives you spell armor when casting shields, making you tankier while supporting. Cleansing Shield removes debuffs from shielded allies, providing Cleanse-like utility. Clear Out makes Expulsion Zone massive and adds vulnerability, turning defense into offense.
Focus on shielding allies who are receiving enemy attention rather than building personal energy. Use Expulsion Zone defensively to create safe zones for retreating teammates. Time Cleansing Shield to remove key debuffs like roots, silences, or damage over time effects. Position between your backline and enemy divers to maximize peel effectiveness.
In short, You're the Team Guardian . Sacrifice personal glory to become the ultimate protector, enabling your team through superior utility and battlefield control.
This path gets oppressive once your shielding and zone control keep forcing bad entries over and over.
If the enemy keeps taking honest entries, this version turns every bad engage into even more charge and even less room.
If the enemy commits into your energy spikes, this version turns their engage into your damage window immediately.
Common Player Mistake
Most Zarya players fail here. They shield too early, gain almost no energy, and then wonder why the hero feels harmless. In real matches, this is where Zarya starts taking over: once the barrier lands on the real commit instead of the setup damage. If Diablo already charged or Greymane already stepped in, that is your real shielding window.
If you ever feel useless on Zarya, it is usually because your barriers were spent before the enemy actually gave you a reason to cash them in.
Real Match Situations
A dive hero finally commits onto one ally. This is Zarya's favorite moment. A good barrier can both save the target and instantly turn your energy into a threat the enemy did not budget for.
The enemy team starts clumping around an objective. That is where Graviton or Expulsion Zone changes the whole space problem instead of just adding damage.
Your carry wants to step into a short but dangerous angle. One well-timed barrier can let them take that trade safely enough to force much bigger cooldowns back.
One Thing to Know
Zarya wins when the enemy's first idea feeds your team's second one.
What Changes Through the Match
Early game Zarya is checking whether her barriers are getting meaningful energy and whether her lane partner can use that protection well. Mid game, heroic choice starts deciding whether she is forcing clumps or controlling space. Late game, one barrier timing can swing everything because the enemy no longer has spare time to recover from a failed commit.
Advanced Tips
Shield allies just before they take damage rather than preemptively to maximize energy gain. That is where protection stops being comfort and starts rewriting the fight.
Use Personal Barrier when diving into enemy teams to become an unkillable damage threat. Used on the real threat window, it can instantly ruin the enemy's clean kill pattern.
Focus on shielding allies who are receiving enemy attention rather than building personal energy. This is usually the difference between a save that matters and a button that came too late.
Use Expulsion Zone defensively to create safe zones for retreating teammates. That one disciplined timing check is what makes the whole hero feel unfair.
Limitations
Zarya struggles when enemies refuse to engage honestly, when your team cannot capitalize on the protected windows she creates, or when barrier timing is nervous and early instead of sharp and reactive. She is powerful, but she needs real contact to get paid.
FAQ
When should I pick Zarya? Pick Zarya when your team values protection and engage support but does not necessarily need a traditional healer from that slot.
Is Zarya good in solo queue? She can work well in solo queue because barrier value is always real, but she feels much stronger when you are disciplined about shielding true danger instead of ambient damage.
What should I focus on most in fights with Zarya? Focus on the enemy commit that actually matters, because that is where your barriers become both defense and damage.
What is the biggest mistake on Zarya? The biggest Zarya mistake is spending shields too early and turning charge generation into a guess.
What habit improves Zarya the fastest? The fastest improvement is learning to delay barrier until the enemy is truly committed to the trade.
Related Guides
If you enjoy support heroes that solve fights in different ways, also check our Medivh guide, The Lost Vikings guide, and Uther guide.
Final Thoughts
Zarya becomes much more rewarding once you stop asking the hero to do everything at once and start leaning into what actually makes them special. If you master these fundamentals, Zarya becomes one of the most impactful support picks in Heroes of the Storm.